In this tutorial we will use the 3D capabilities of Photoshop CS5 Extended to create a chocolate volcano and text effect. Let’s get started!
Step 1
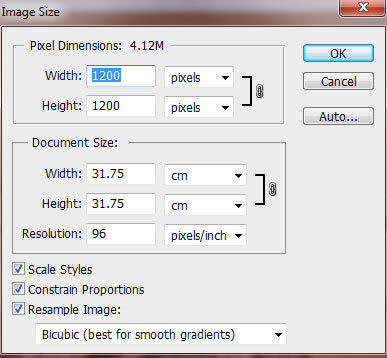
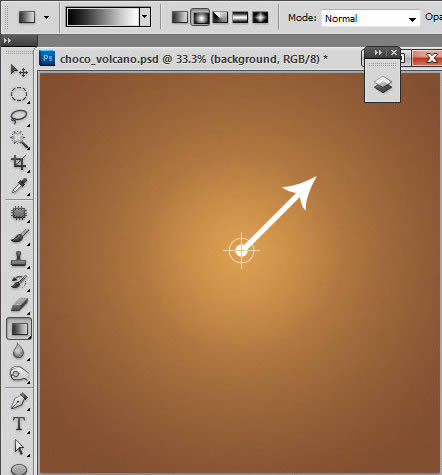
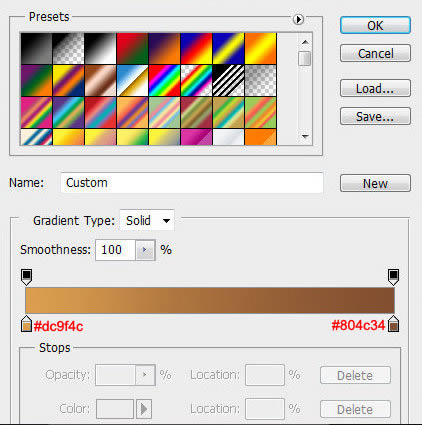
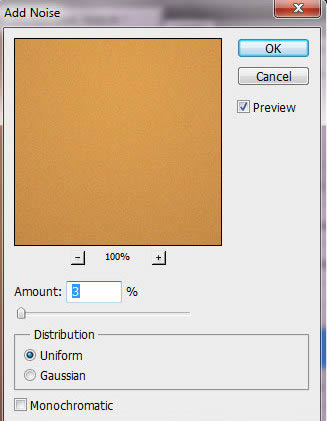
Create a new Photoshop document, the size is 1200×1200 px and resolution 96 px/inch. Fill background layer with the radial gradient. Then add small noise effect, Filter > Noise > Add Noise.
Step 2
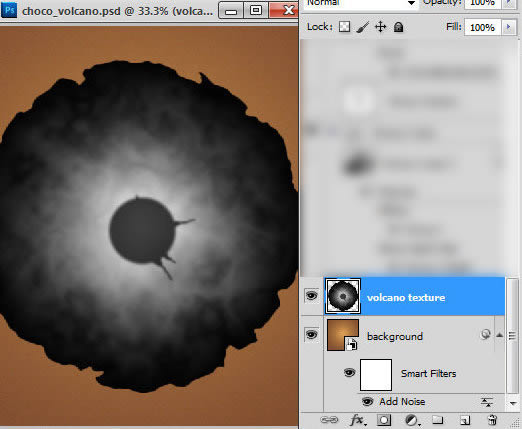
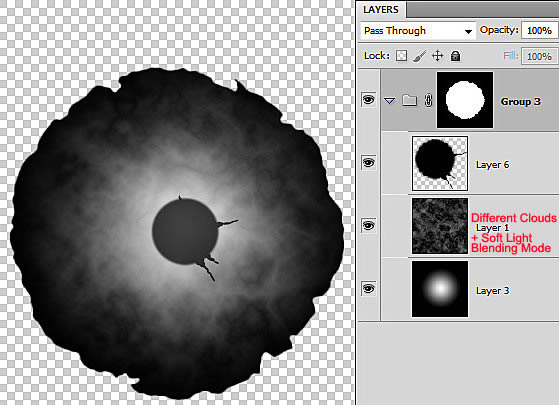
Insert the
texture we will use to create 3D mash from grayscale. You may create your own texture with several simple steps. 1). Create a square Photoshop document, fill the whole area with radial black and white gradient. 2). Create a new layer, fill with the white color and apply Different Clouds Filter (set default colors -black and white, command D), choose Soft Light Blending mode for this layer. 3). Create a dark circle in the central part of composition and draw craquelures by using small round brush. 4). Merge all created layers, apply Gaussian Blur filter (2-3px). Then erase square corners, try to get the circle shape with the ragged edges.
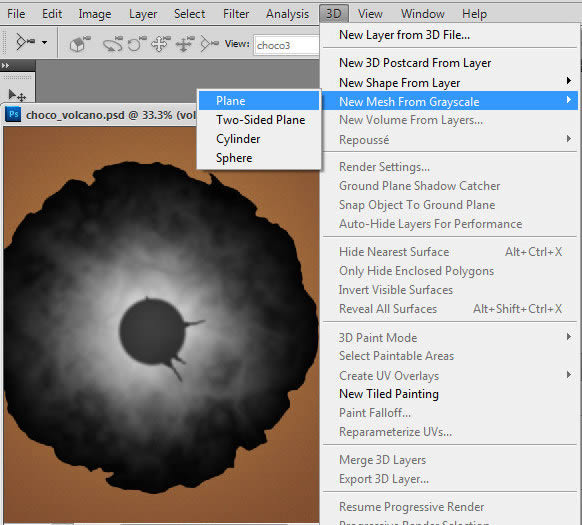
Step 3
In order to extrude volcano 3D shape from the gayscale image, go to 3D > New Mesh from Grayscale > Plane.
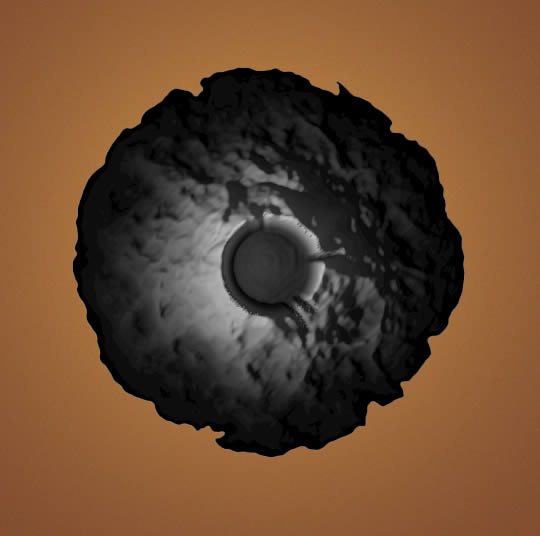
Step 4
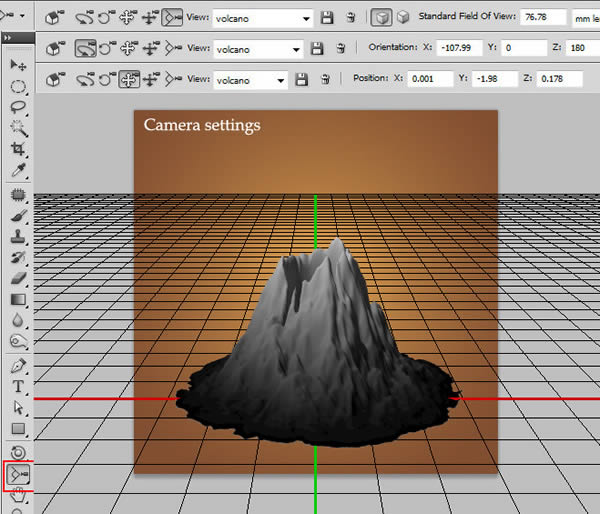
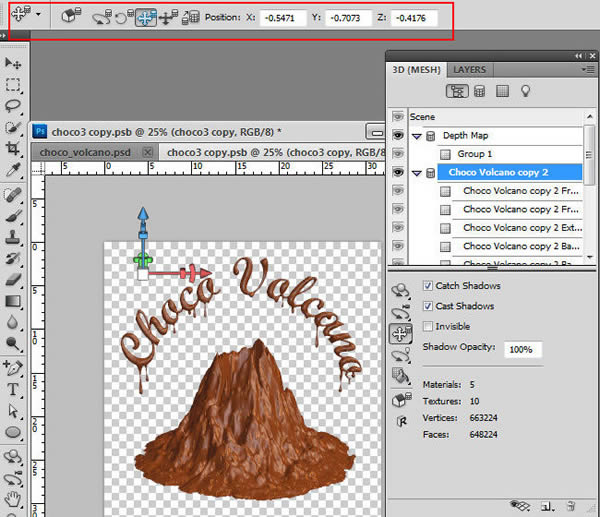
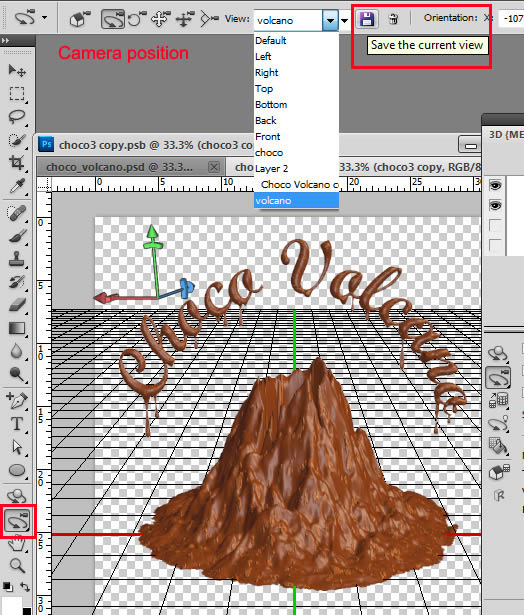
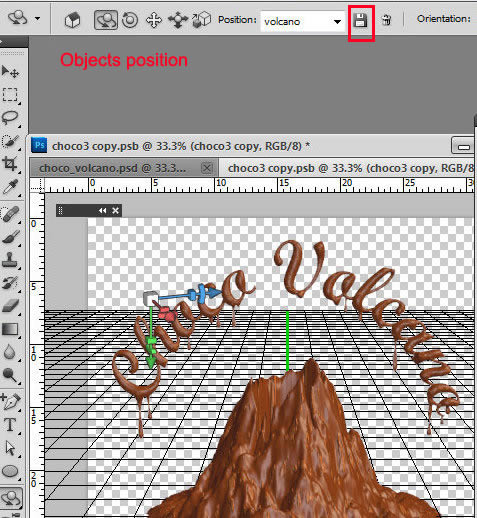
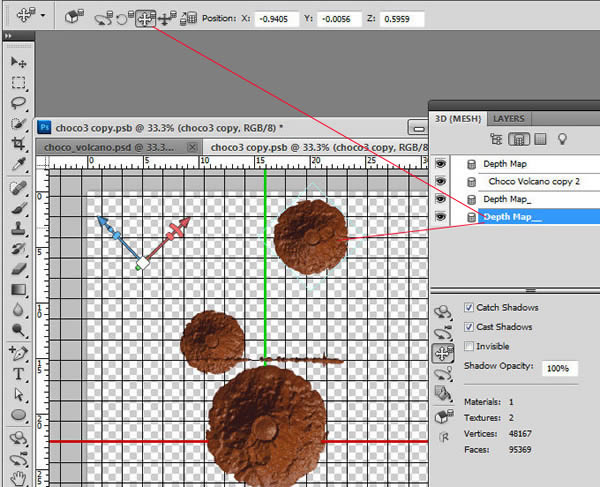
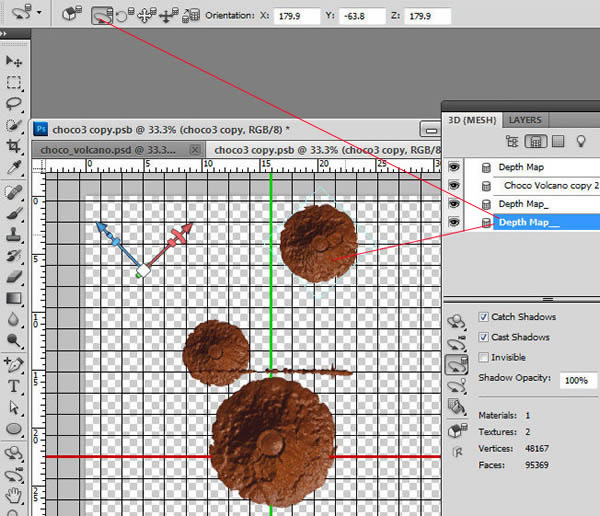
Move camera and set object position with reference to the ground plane. In order to get the position like in this tutorial, use following camera and object settings.
Step 5
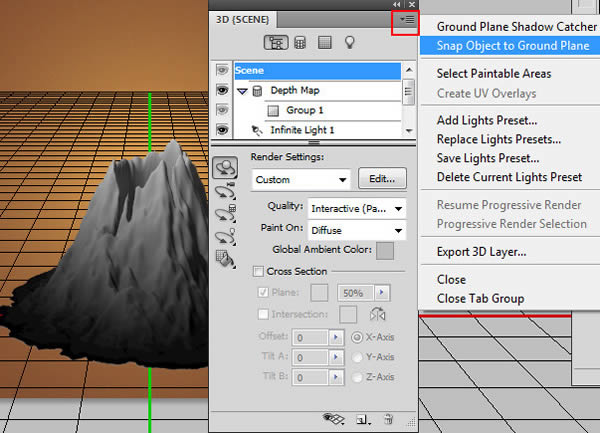
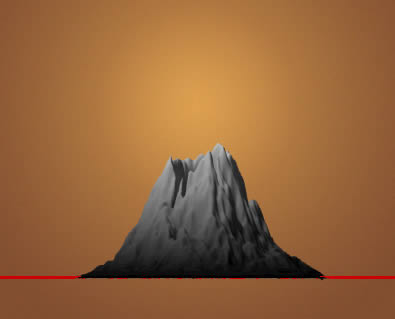
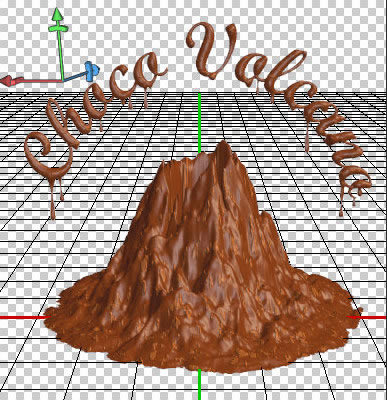
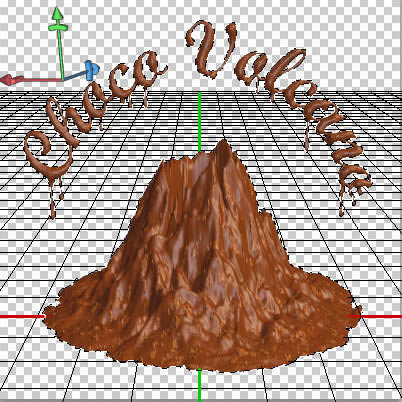
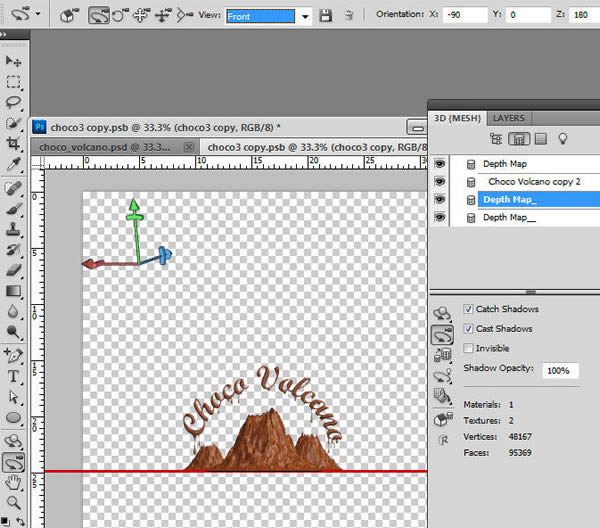
The simple way to snap Volcano shape to the ground and keep all other future 3d shapes in plane is – "Snap Object to Ground Plane". You may see snapped object from the "Front" camera position on the second screen shot.
Step 6
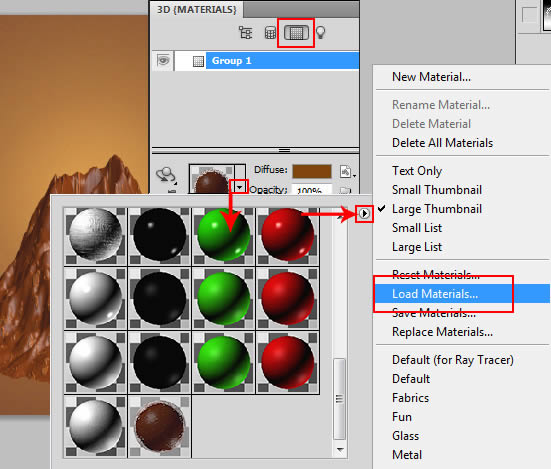
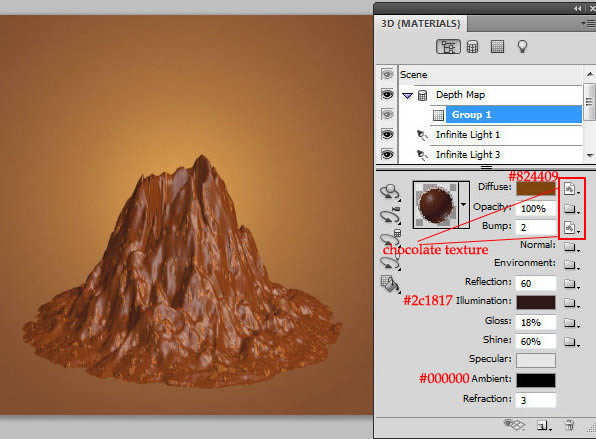
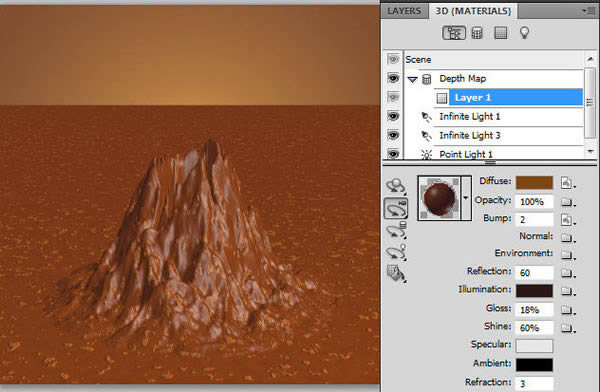
In order to cover volcano shape with chocolate texture, download
Chocolate material and install it using 3D settings palette. Choose "Materials" section in the 3D palette, click small arrow next to material thumbnail, then select "Load Materials and find downloaded .p3m file on your computer. You may create material by yourself using settings from the last screen shot, remove gray scale depth texture from the Opacity parameter.
Step 7
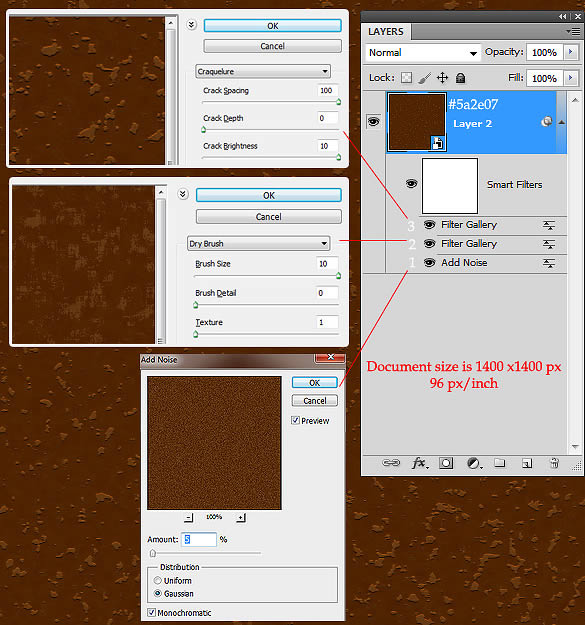
You may create your chocolate texture with several steps. Create a new square Photoshop document and fill background layer with the brown color #5a2e07 and apply following filters, start from number 1 – Noise effect. Next one – Filter > Artistic > Dry Brush and Filter > Texture > Craquelure.
Step 8
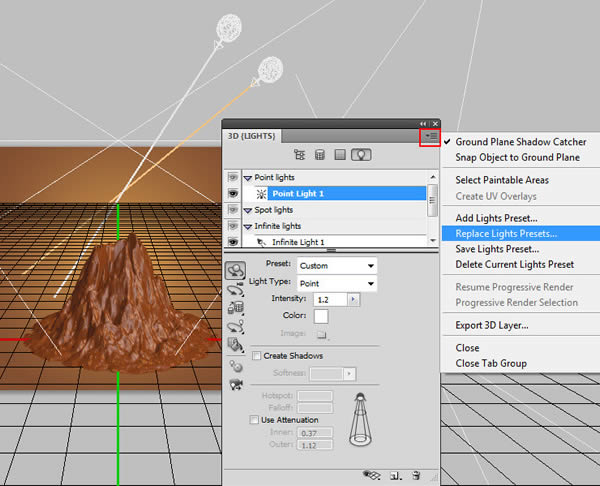
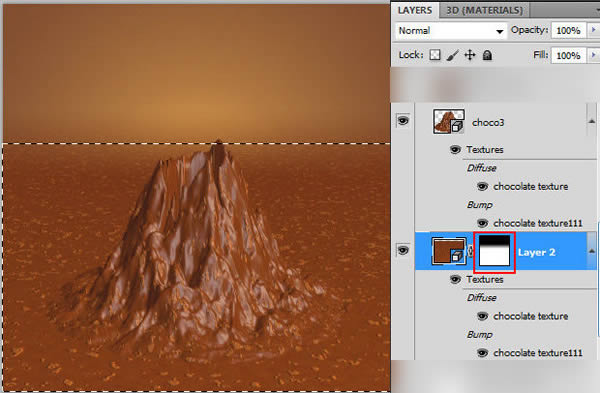
Download lights file and use it for the volcano 3D scene. Choose "Replace Lights Presets" from 3D palette drop down menu and find "choco_volcano.p3l" on your computer. Duplicate created 3D volcano layer, we will use the duplicate to create small mountains in the background. You can make duplicated layer invisible for a while.
Step 9
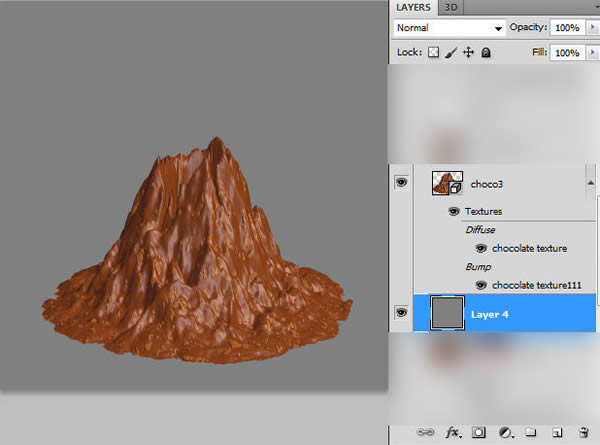
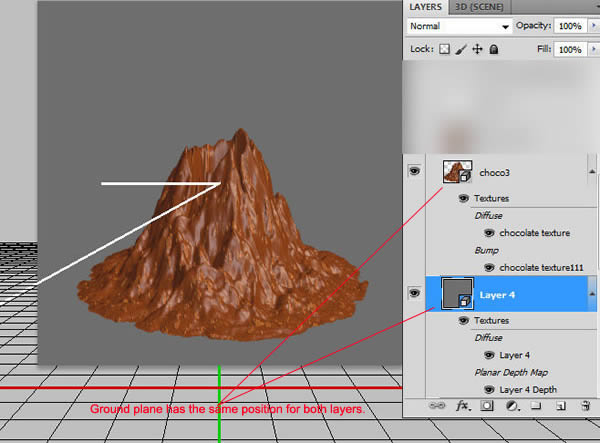
Create a new layer below 3D volcano shape and fill it with gray color. Do the same thing as for the volcano grayscale, go to 3D > New Mash From Grayscale > Plane.
Step 10
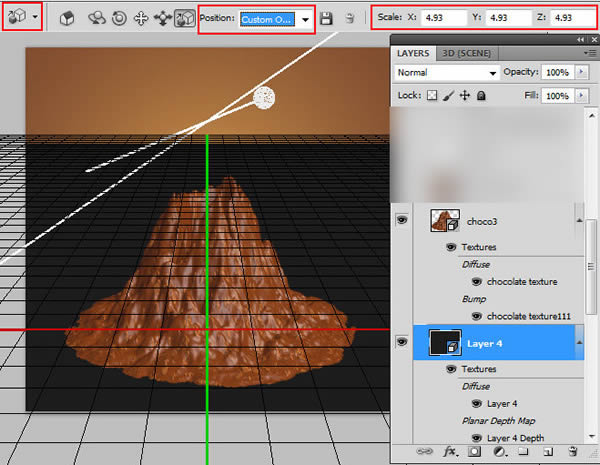
Keep active 3D gray plane layer and adjust camera position for this shape. Take Camera Moving Tool

and apply absolutely the same seatings as for volcano layer in the previous steps. Just choose volcano camera settings from the View list and apply it for the gray plane.
Step 11
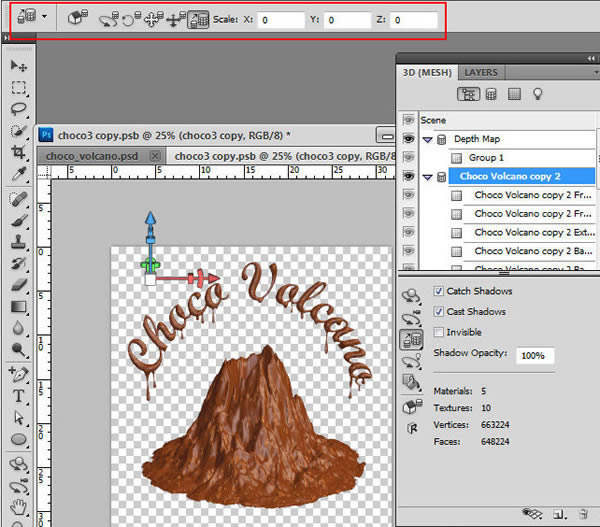
Set object position for the new 3D layer using the same way. First, choose volcano layer position from the drop down menu and change only the Scale parameters, make this object larger.
Step 12
Apply the same material and light preset as for volcano 3D layer.
Step 13
Add layer mask to the ground plane layer and fill the top part with the Linear black and white gradient.
Step 14
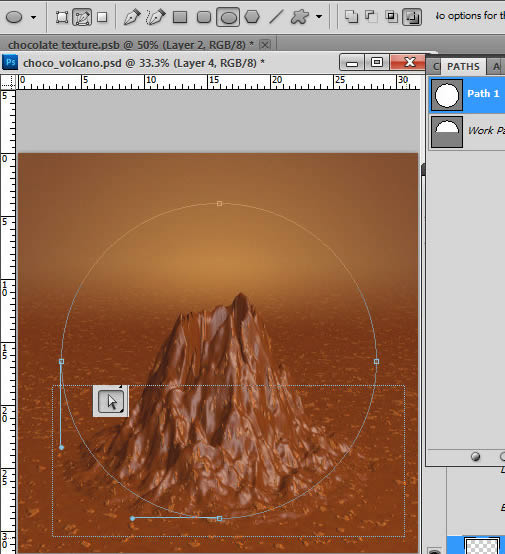
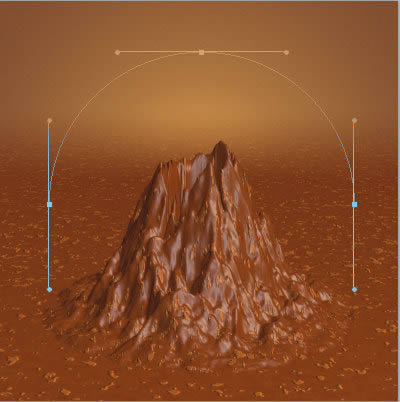
Create a path for the future 3D text . Choose Ellipse Tool and Paths Mode and make the ellipse with diameter around 945px. Then choose Direct Selection Tool, select the bottom point and remove it
Step 15
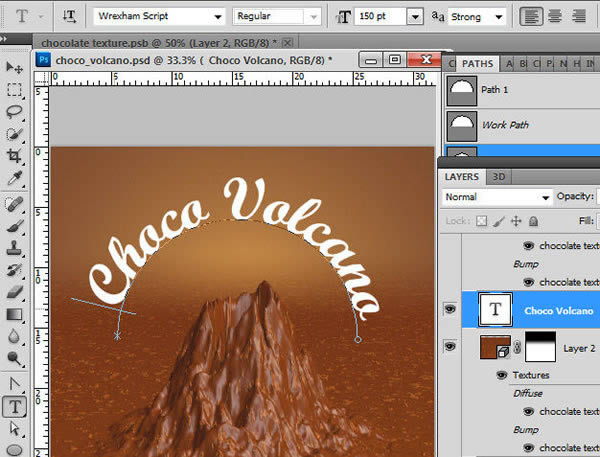
Choose Horizontal Type Tool, adjust the font and size. Position the pointer so that the baseline indicator of the type tool

is on the path and click. After you click, an insertion point appears on the path. Type the text.
Step 16
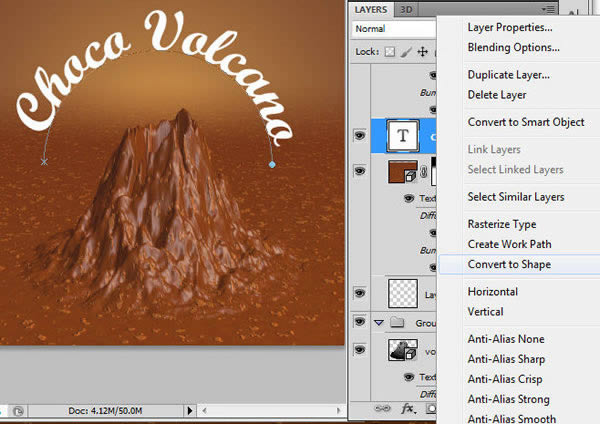
Convert text layer to the shape, right click text layer and choose "Convert to Shape".
Step 17
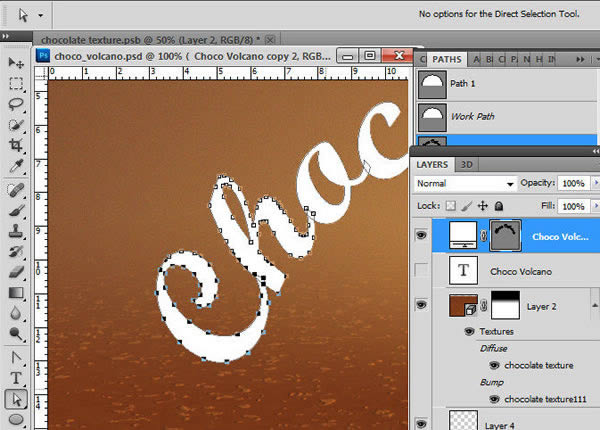
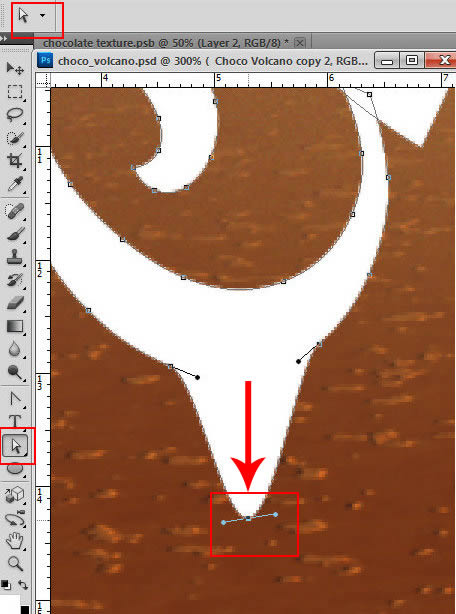
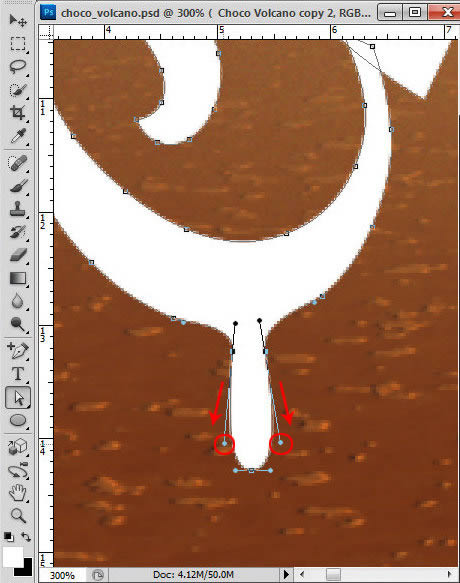
Now you will be able to change text contour and add leaking/drops effect. Choose Direct Selection Tool and drag one of anchor point down.
Step 18
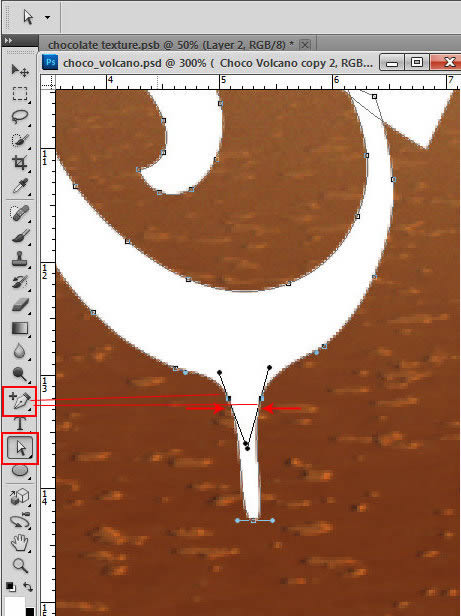
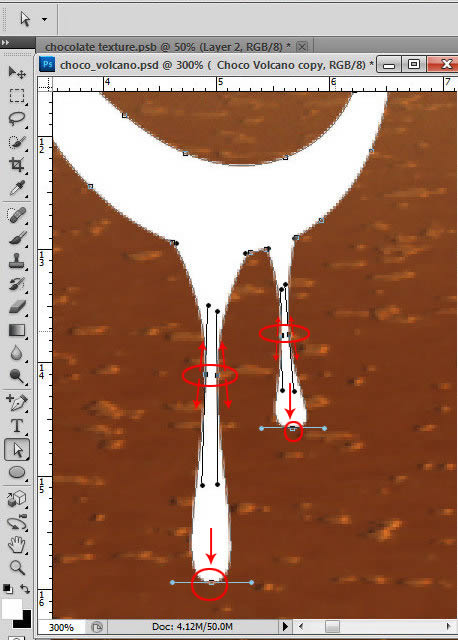
Add couple new points using Add Anchor Point tool

and move them with Direct Selection tool

to get similar result as on the screen shot. Use the same way to create other drops.
Step 19
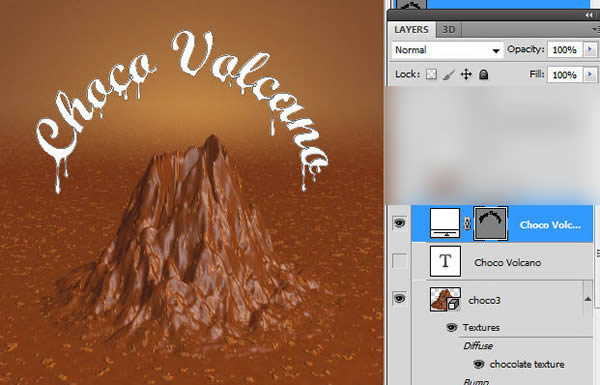
You will have similar result.
Step 20
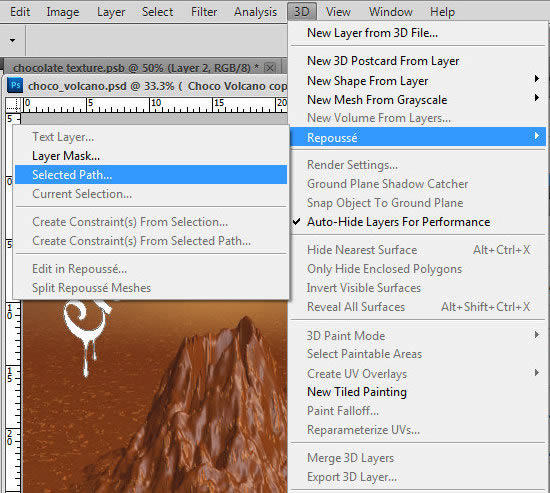
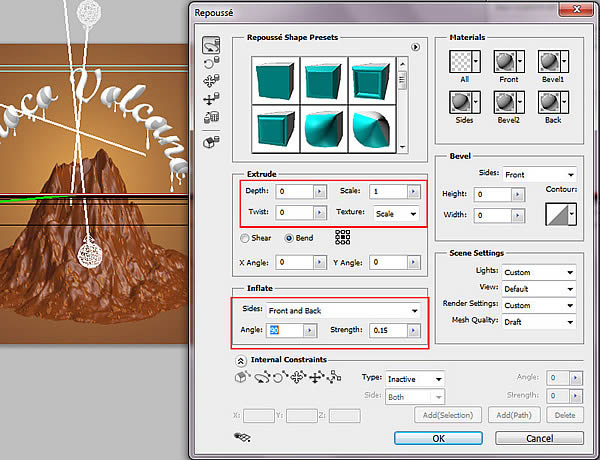
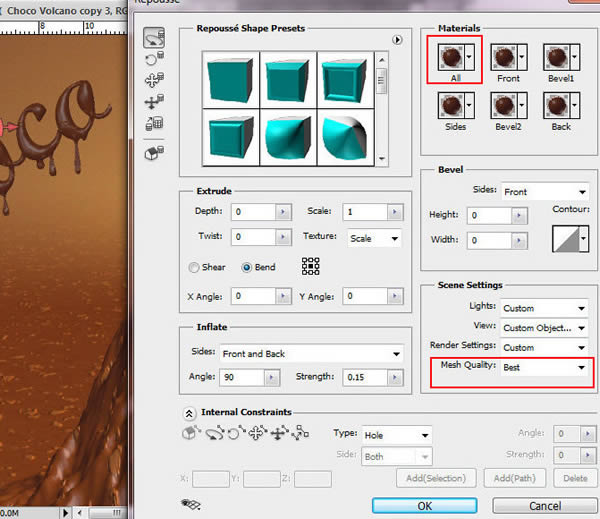
In order to create 3D effect for the text layer, Make layer path active, go to 3D > Repousse > Selected Path. Apply setting like on the second screen shot.
Step 21
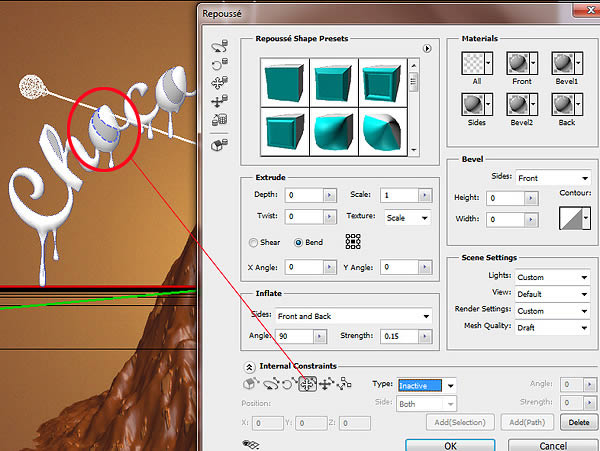
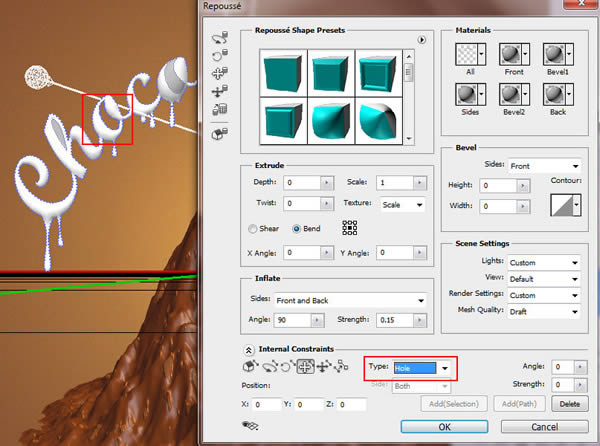
In order to make holes inside the letters, select inside path with any constraint and choose "Hole" type.
Step 22
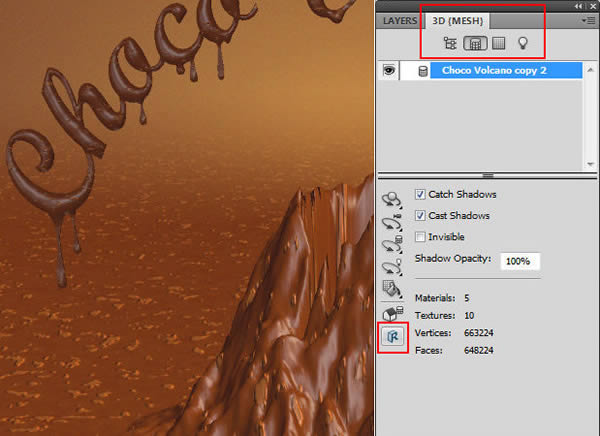
To return to the 3D Repousse window settings and make changes, just click icon in the bottom part of 3D palette or go to 3D > Repousse > Edit in Repousse. Apply the same chocolate material for this shape as for the volcano and ground plane.
Step 23
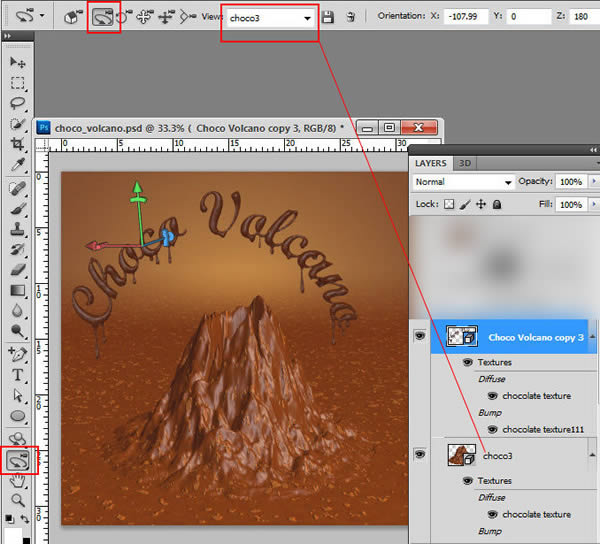
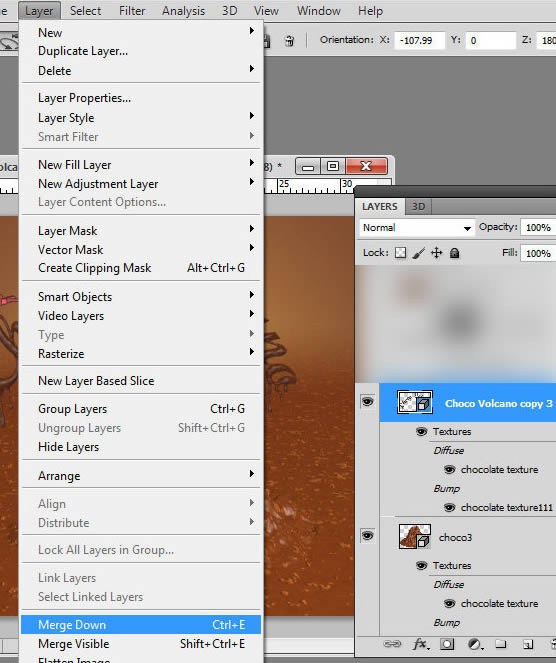
In order to prepare combine text layer and volcano, apply the same camera settings, then go to Layer > Merge Down.
Step 24
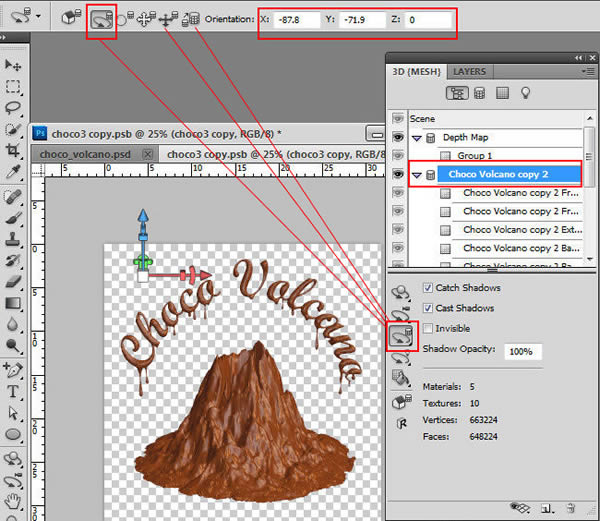
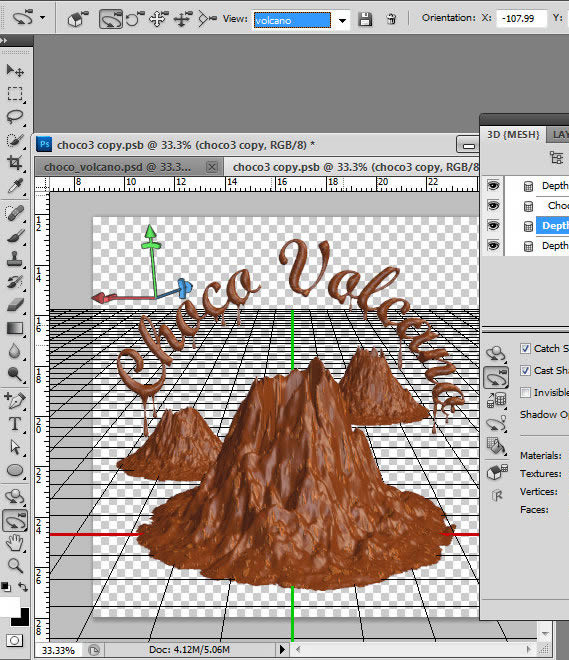
The text layer merged with the volcano 3D shape has the same lights preset and looks more similar. You may adjust text shape position after merging using Mesh moving Tools. Choose text mesh in the meshes section and apply position parameters just like on the screen shots below.
Step 25
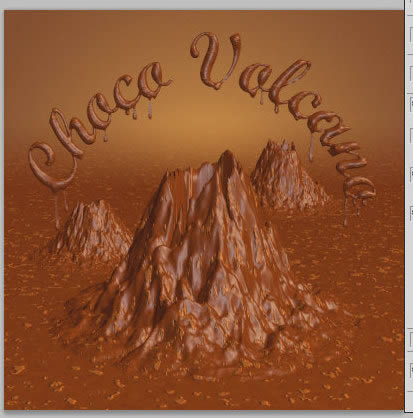
You should get a similar result. Load selection for the combined 3D layer and fill selection with any color in a new layer or save this selection in the channels palette. We will use created silhouette to mask front objects before lens blurring in the final steps.
Step 26
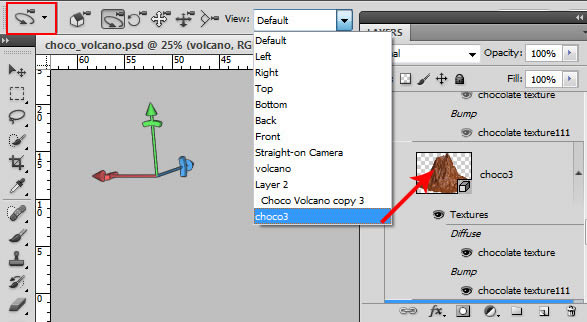
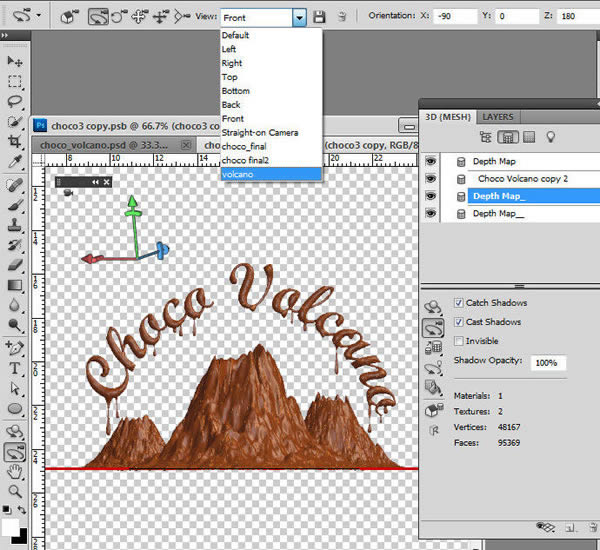
Save the current settings of the camera and objects position, name them "volcano" for example. It should appear in the "View" list.
Step 27
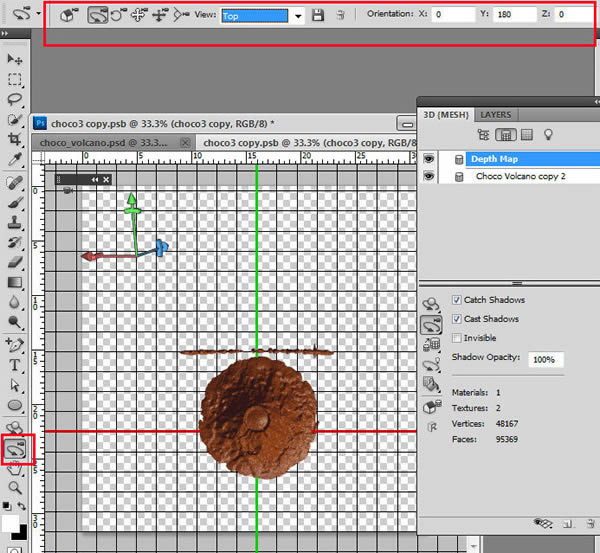
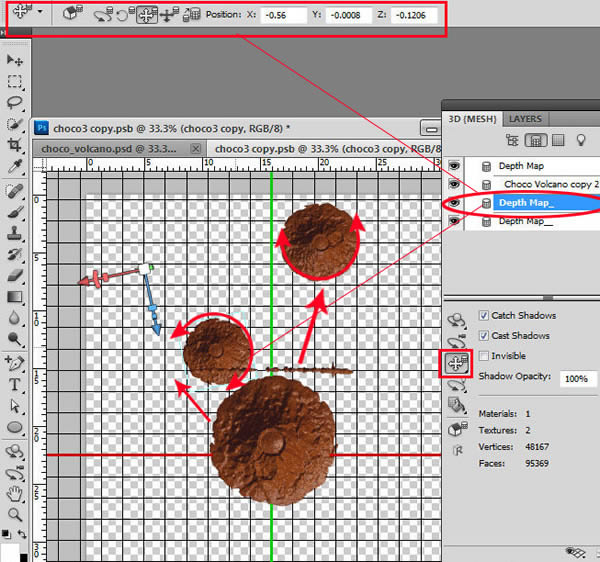
After saving scene positions, choose Top view, it will help to insert correctly the new objects into the 3D scene.
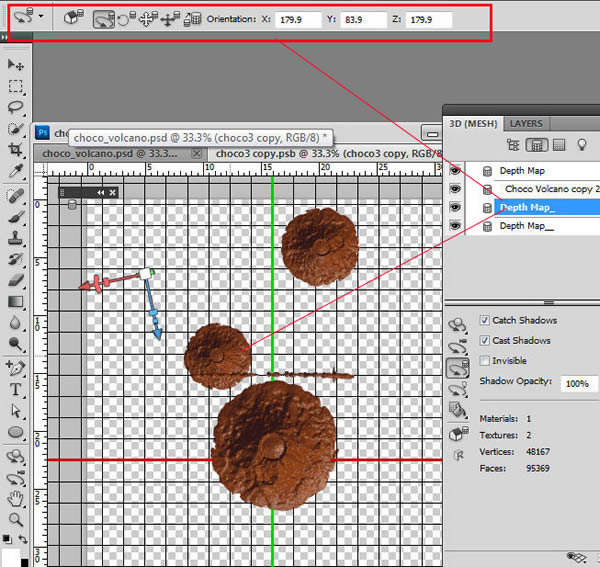
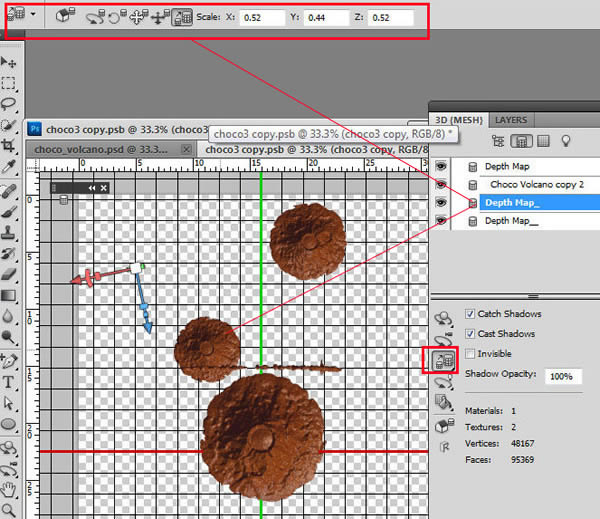
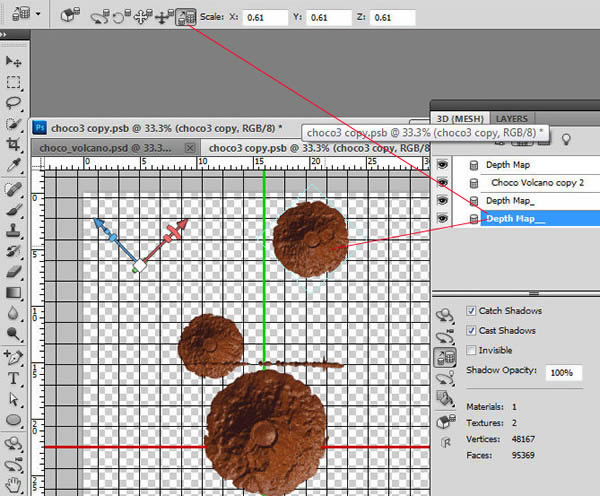
Step 28
Find the copy of 3D volcano, duplicate it once again. Move copied layers above the 3D scene with text and merge them down in turn. Then move, scale and rotate them using Mesh moving tools. You may use mesh position settings from screen shots below:
Step 29
If you change camera position to the "Front" you should see something similar:
Step 30
Return original "volcano" camera position.
Step 31
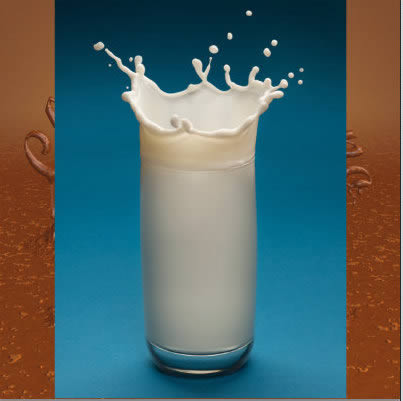
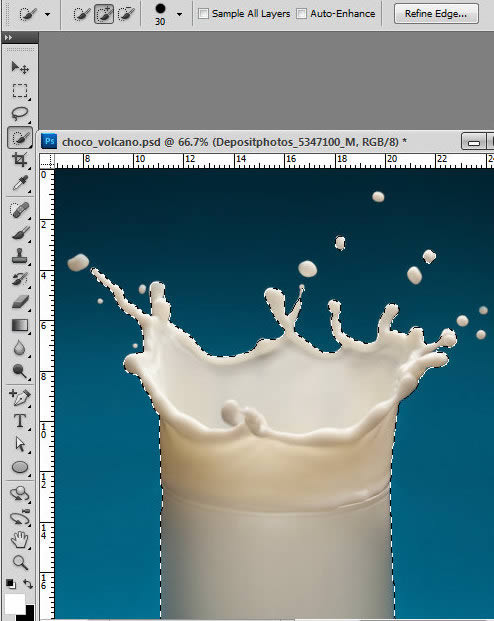
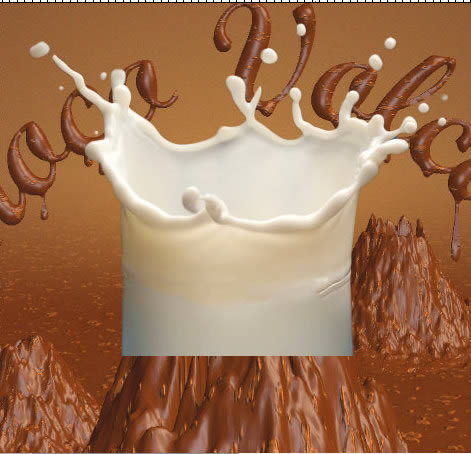
Insert milk image into a new layer.
Step 32
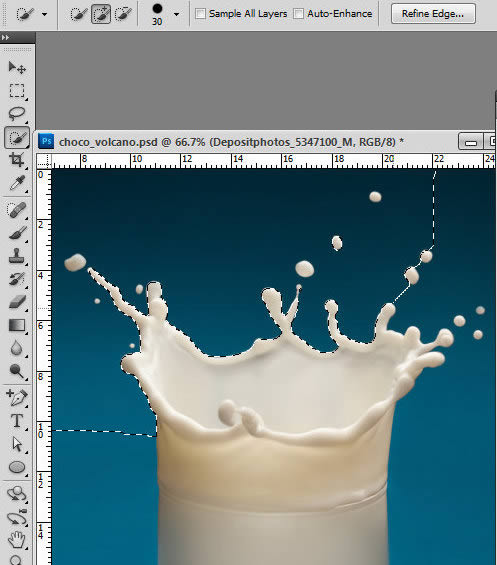
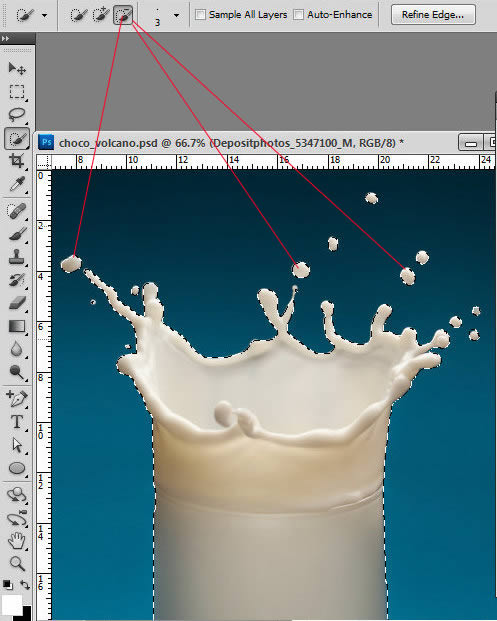
Select background with the Quick Selection Tool or Magic Wand. Correct missed milk drops using Subtract From Select Mode, check out the last screen shot.
Step 33
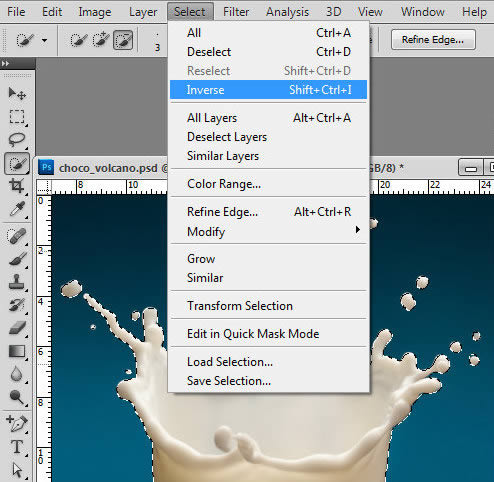
Inverse selection.
Step 34
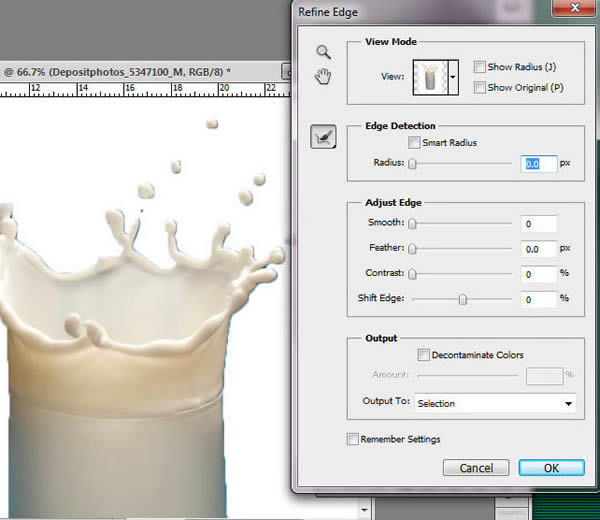
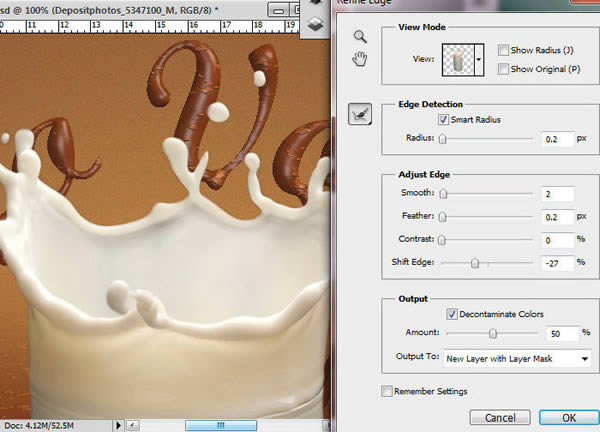
Then go to Select > Refine Edge. Apply settings like on the second screen shot.
Step 35
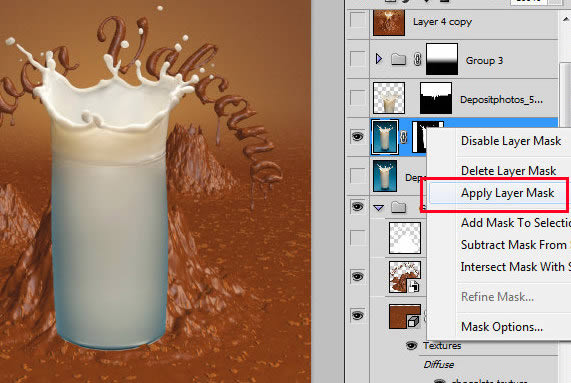
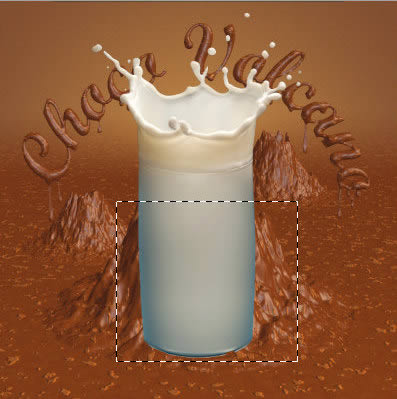
Click "Ok", then right click milk layer, choose Apply Layer Mask. Cut out the bottom part of the milk glass.
Step 36
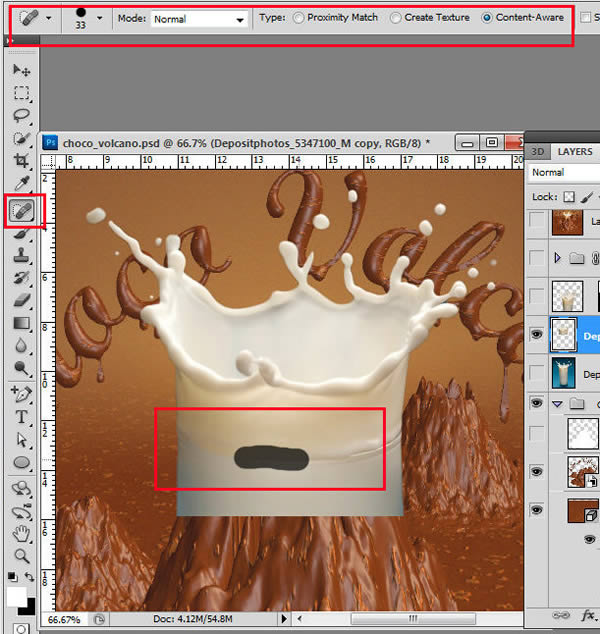
Choose Spot Healing Brush and remove glass edges using Content-Aware Mode.
Step 37
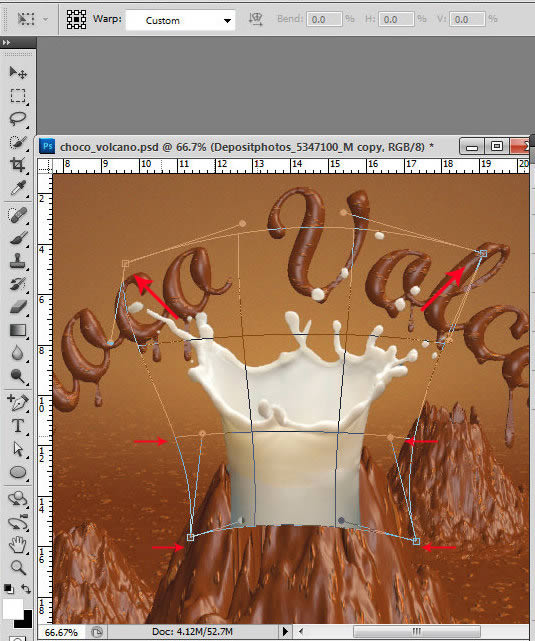
You may change splash shape a bit using Warp Transformation. Go to Edit > Transform > Warp. Drag handles and move points like on the example below.
Step 38
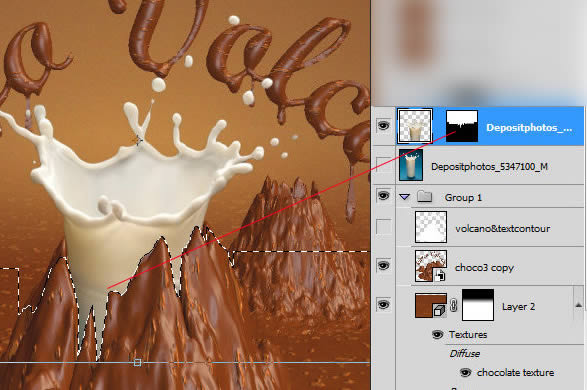
Add Layer Mask to the milk layer once again and erase volcano crater contour with small black brash.
Step 39
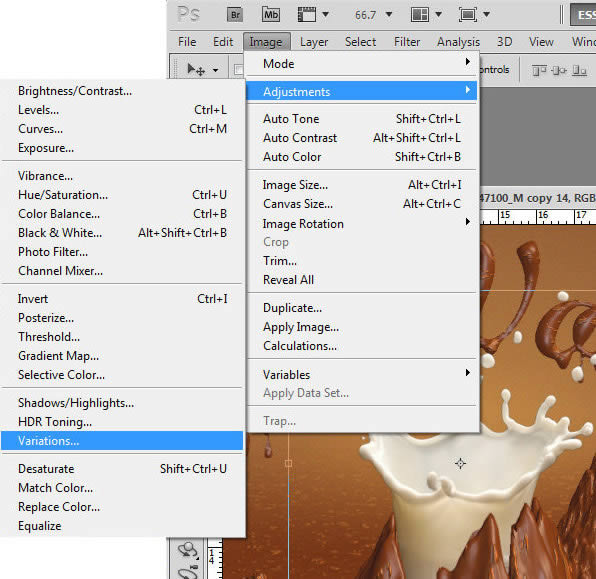
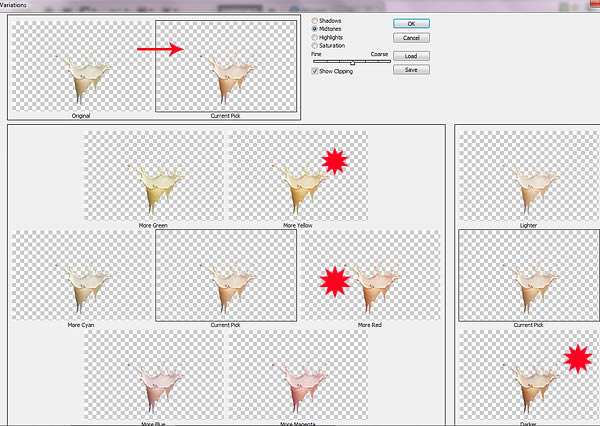
Apply Auto Contrast to the milk splash, then duplicate splash layer and go to Variations. To better integrate milk image to the current chocolate warm scene, click to the marked tones variations, you will get warmer and darker tone.
Step 40
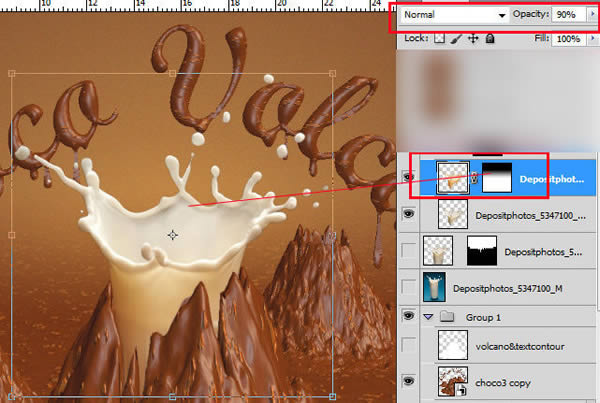
Play with Opacity Parameter. To make the top part of splash lighter, add Layer Mask and fill it with black and white gradient in the top area.
Step 41
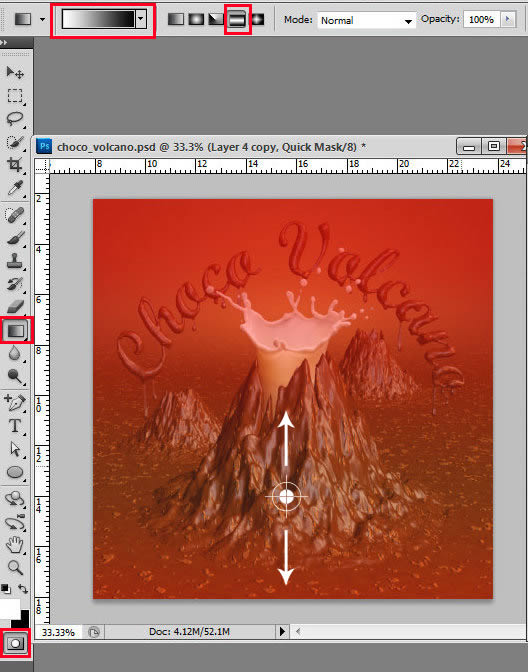
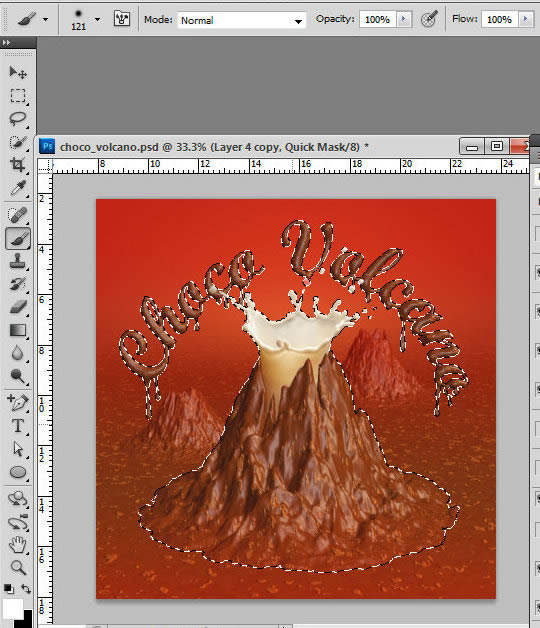
Load selection for the whole document, go to Select > All. Then go to Edit > Copy Merged, paste merged layer content into a new layer. Press Quick Mask icon

and fill the bottom part of the document area with the Reflected black and white gradient.
Step 41
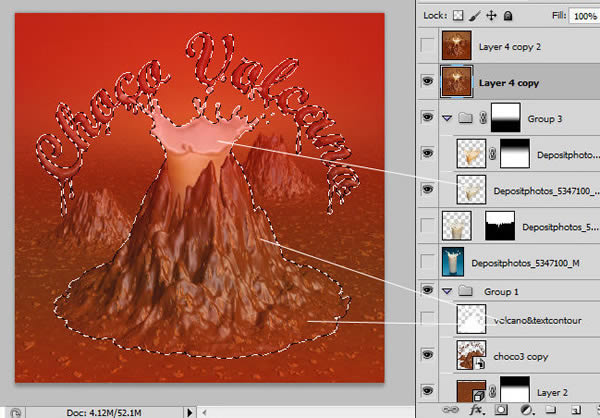
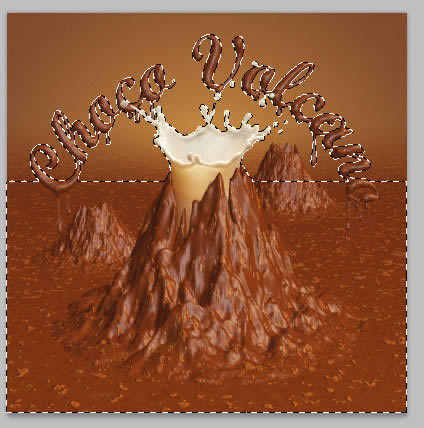
Find volcano and text silhouette, use Command/Ctrl + click layer thumbnail to load selection, Command/Ctrl + Shift + click milk layer thumbnail to add this part to selection. Take a white Brush Tool and erase red shade from selected area, except the bottom part of volcano.
Step 42
Deselect selection and then release Quick Mask.
Step 43
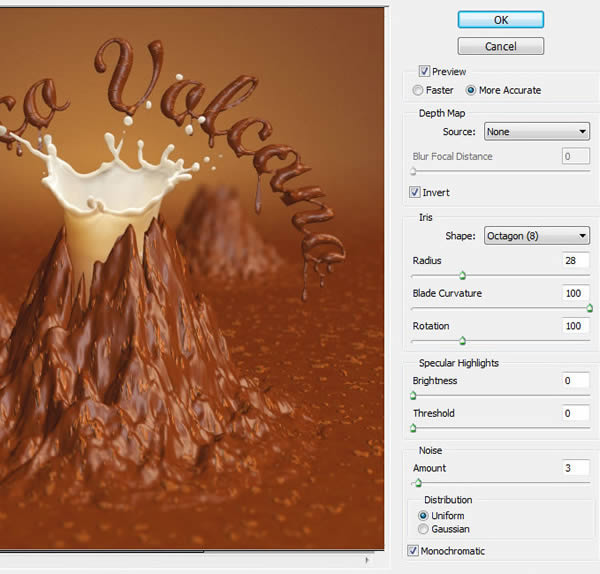
Go to Filter > Blur > Lens Blur. Apply following adjustments:
Final Image


www.onlinegamebook.com ~ Play most popular online games from more than 20 top games genre...