In this tutorial, we are going to design up a simple business card in Photoshop and get it ready for print with crop marks and bleed. Normally you’d do some of this with a tool like InDesign, but it is in fact possible to get by with just our trusty old Photoshop.
Calling Card Competition
Over at our sister site FreelanceSwitch, there is a competition to make business cards using vectors from a special Arsenal sample pack. So if you’d like to Win $370 worth of vector gear, head over and put in your entry! I actually had to make an example card for the write-up, and while making it, decided to write a tutorial for what I was doing (which is what you are about to read :-) )Step 1
Ok, so the very first thing we need to do is create a New Document. Depending on where you are planning on getting your cards printed, you may need different dimensions. The printer I use here in Sydney has a default card size of 90mm x 55mm.When sending things off to printers however, you need to add a sort of border around the image called a Bleed. A bleed is basically the space on the edges of your design where the image keeps going past where the printer is going to cut the paper. That way if the cut lands a mm to either side you don’t wind up with blank paper at the edges. How much space you leave for bleed also depends on your printer. Generally speaking 3mm – 5mm is a good amount of bleed.
Because of a quirk of Photoshop (which you’ll see later) we’re going to use a value of 3mm. So when creating the image, instead of making it 90mm high we are making it 90mm + 3mm bleed on the left + 3mm bleed on the right = 96mm. Similarly with the width, we’re making it 55+3+3 = 61mm.
Note also that because we are making something for print you should set the Resolution to 300dpi and Color Mode should be set to CMYK. We’ll talk more about the color mode later, but with the resolution you should note that 300dpi basically means there is more image information available so you get a sharp print out.
If you ever have to make a huge poster, you can sometimes get away with as little as 120dpi, but it really depends how far away the person will be looking at your work from. If you are printing 120dpi, the quality up close will be pretty bad. If it’s a giant poster (think meters rather than centimeters), then you can get away with it. Anyhow because this is a business card, we should make it 300dpi so it’s a nice, high-quality print.
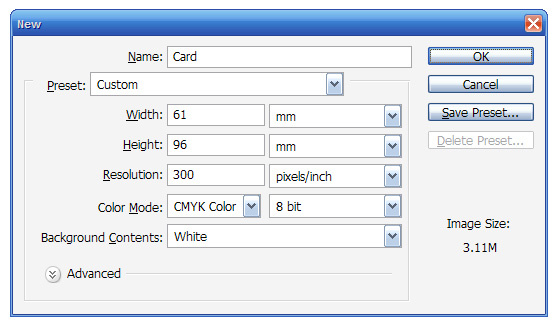
Step 2
Once the document is created, the first thing we need to add are some guides to show us where the edges of the business card are and where the bleed starts. So first of all press Ctrl-R to switch on your rulers. Now to add the guides, you can either click on the ruler and drag guides out on to the document, or for a more precise method, go to View > New Guide and then give it a Horizontal position of 3mm. Repeat again with a Vertical position of 3mm. Then repeat twice more with Vertical / 58mm and Horizontal / 93mm.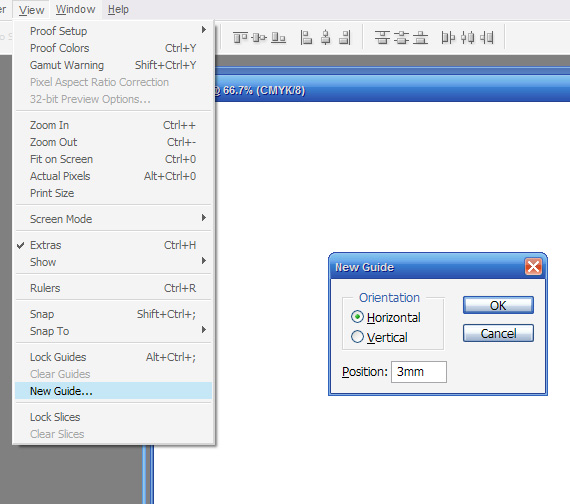
Step 3
You should now have a blank canvas similar to the one below with four guides, each 3mm away from the edge.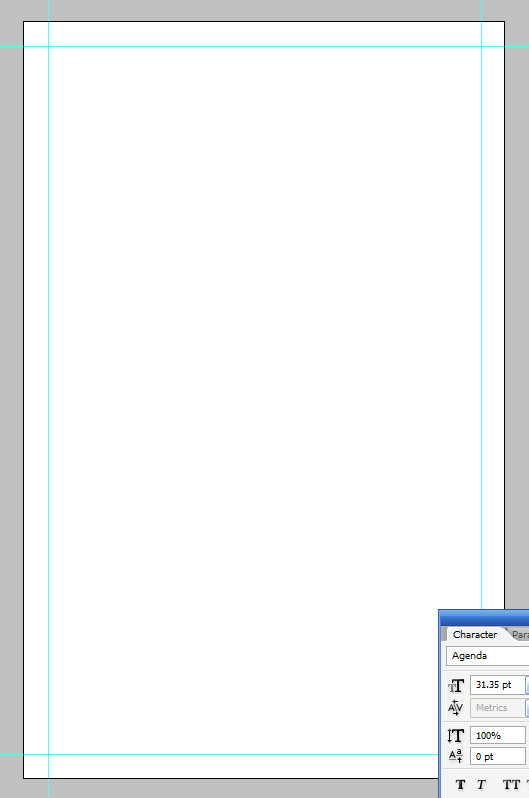
Step 4
Now because I made this card for the FreelanceSwitch Card Competition I had to use an element from Arsenal’s freebie pack of vectors and textures. I chose this nice texture of concrete because it looks nice and urban! You can download the texture yourself by visiting Arsenal’s site and clicking on the Free section.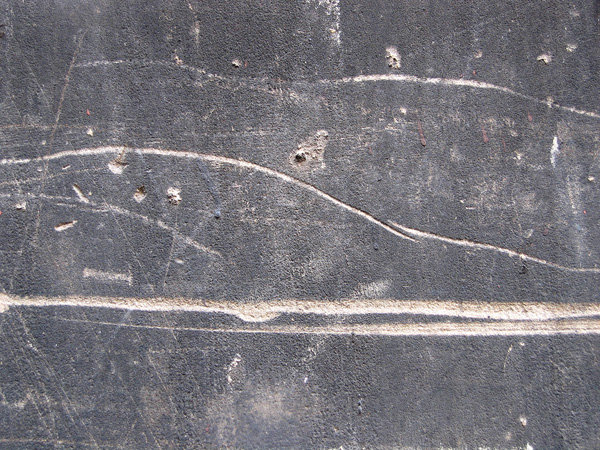
Step 5
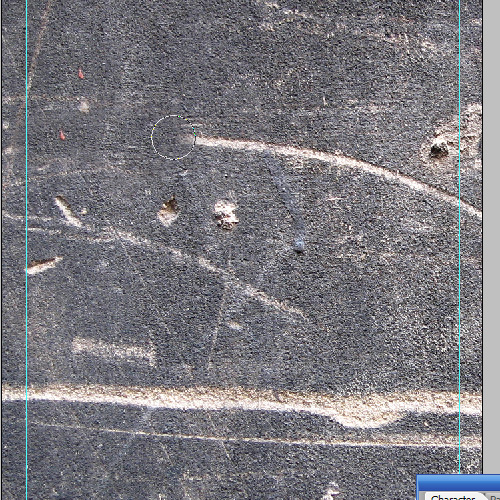
So after pasting the texture in, I hit Ctrl-T to transform it to roughly the right size. Now while I want the texture to be dirty and grungy, right now it’s a bit TOO dirty and noisy. So first of all we’ll get rid of the two gigantic lines running along from left to right. We can do this with the Clone Stamp (S) Tool. I discussed this tool the other day in the magazine tutorial, but just to refresh, you press Alt to select the area you want to clone (in this case I just used the area directly above) and then brush the area you want to clone over.Using a soft brush on a texture like this concrete means it’s quite hard to detect if you’re not directly looking for evidence of cloning.
Step 6
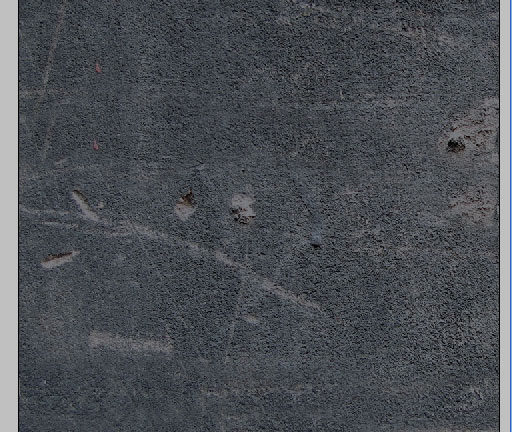
So now we have it looking still rough and urban, but not quite so rough.At this point I decided that I wanted to darken the texture, so I added a layer above filled with the color #797c82 and set it to Multiply. However, the look was a bit strange and has a sort of bluish cast (see below) whereas I want it darker and greyer. This is to do with the color mode we’re in – CMYK. So time to talk a little bit about color modes… (at least as I understand them)
Basically CMYK are the four process colors that most printers print with. Using these four colors (Cyan, Magenta, Yellow and Black/Key) you can make most other colors. You can, in fact, get special inks like Pantones as well which we’ll discuss in a future tutorial, but for most things it’s just straight CMYK.
Now on your screen, however, you use RGB which as you know stands for Red, Green, and Blue. The difference comes because on a screen you are looking at light mixing, so if you add all the colors together you get white – that’s why in RGB the color code for white is R:255, G:255, B:255 – i.e. full red, full green, full blue.
On paper, on the other hand, you are seeing the result of light interacting with an object. From my hazy recollection of high school science class when light shines on an object – say a red wall – the object in fact absorbs the light and reflects back the ones it cannot absorb, so the red wall reflects the red, but effectively eats up the rest, giving it the appearance of being red. So basically on paper it’s the *opposite* of on-screen where it’s projected light. On paper having full Cyan, full Magenta, full Yellow and full Key in fact produces black because it absorbs all the light (which is the reverse of RGB where it produces white).
Now all of that was just some useful information explaining why there are different color spaces. The key thing to note is that the range of colors you can make with CMYK is smaller than what you can make with RGB. So when you switch to CMYK, you will find that some things don’t work as well – things like Overlays, or getting super bright colors to show. Once you actually print out, often they will still look nice enough, but sometimes to do the things you may have gotten used to in Photoshop, you have to switch between color modes. Remember though that if you switch to RGB, you should switch back to CMYK before you send it off to print. To preserve the effects, we will flatten everything down at that point (you’ll see what I mean later).
Switching Color Modes
Ok, hope you’re still with me–basically what happened at this step is that I decided I needed to switch back to RGB to get the right darkening grey, and more importantly in the next step when I want to put yellow blocks overlayed, I also will need to be in RGB.
So you can do this by going to Image > Mode > RGB Color. It will ask you if you want to flatten the image–say no! You should see an immediate shift in the coloring of the darkening effect.
And, yes, I could have made this step a lot shorter and just told you to go to RGB, but it’s useful to learn about color spaces :-)
Step 7
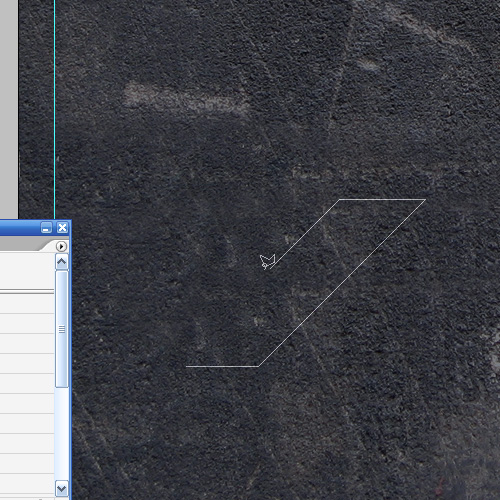
So here we are in RGB mode. Next we want to draw some diagonal blocks. So grab the Polygonal Lasso Tool (L) and then create a new layer.Now you want to draw the shape shown below. To do this nicely, you should hold down Shift so that it forces the angles to be multiples of 45′ and give you a nice even shape.
Step 8
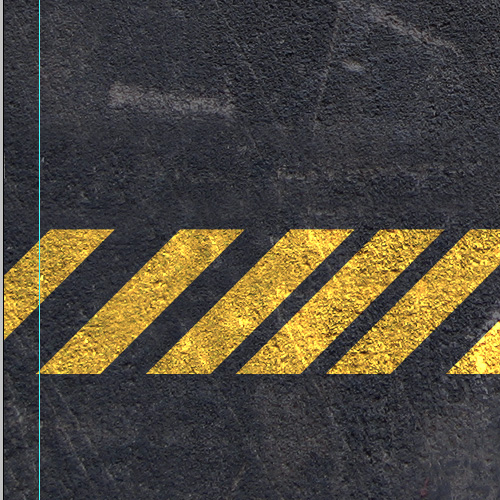
Once you have the shape, fill it with Color: #c4b10f, which is an ugly yellow color, and then set the blending mode to Color Dodge. Now you should have a bright yellow that looks like the one below. Note that if you switch back to CMYK, you will see how this effect doesn’t work at all and why we had to switch to RGB earlier.Anyhow duplicate this layer a few times until you have six yellow bars and just roughly space them out so that one is right on the left and another right on the right with the rest clumped in between (we’ll space them accurately in the next step).
Step 9
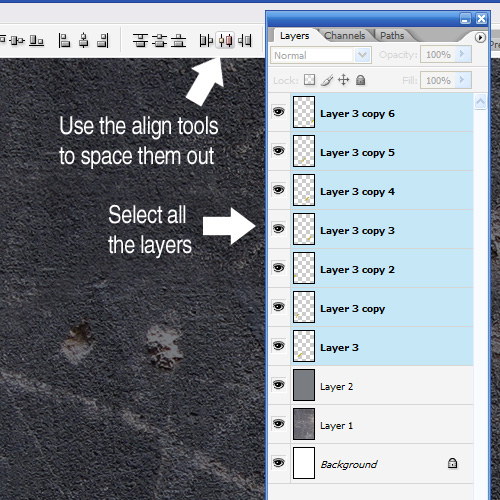
Now rather than trying to space by eye or by pressing the arrow key the same number of times (which I’m embarrassed to say I often do), we will use the align tools. So first hold down Shift and select all the layers with yellow bars in them. Then up the top click the Align Tool marked below. This will automatically space them accurately!(Note that I think in Photoshop versions earlier than CS2, you need to link the layers with those little paper clips because Shift-Selecting layers only appeared in CS2 – the version I use. CS3 users I expect are similar to CS2.)
Step 10
OK, now we have a nicely spaced-out little marking that looks sort of industrial!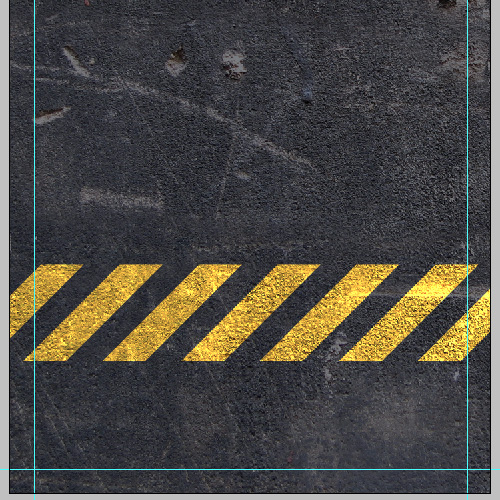
Step 11
Next I created a new layer above and with a large soft black brush gently brushed along the edges. Remember, that anything outside the guides will probably not make it into the final card (unless the printer misses their cut), so the black should extend just over the line if it’s to be visible in the final product.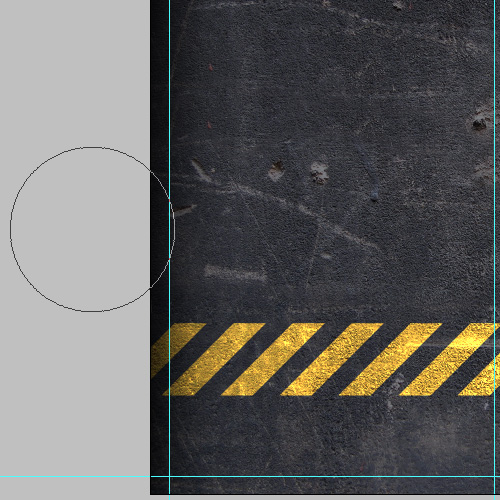
Step 12
So just to discuss bleed again, as I mentioned earlier everything outside those guides is just extra material for the printer to cut away. So it’s important at no point to put important things like text anywhere near the edges unless you don’t mind it potentially being cut. In my experience most printers in practice don’t stray very far from the cut line, however it CAN happen, especially if you use a cheap printer.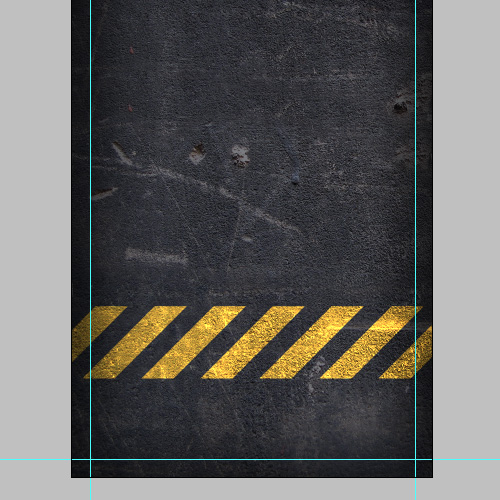
Step 13
One problem doing this stuff in Photoshop is that there is no way to automatically hide the bleed area, which means sometimes when looking at the design it doesn’t quite look right. In InDesign you can switch to a special preview mode that hides the bleed, but in Photoshop we have to do this manually. So often I will create a layer above all the others and fill the bleed areas with white. Then I can switch this layer on or off so that i can see a little more accurately the proportions and area that will actually make it to the final printed item. Just make sure you switch these off before sending to the printer!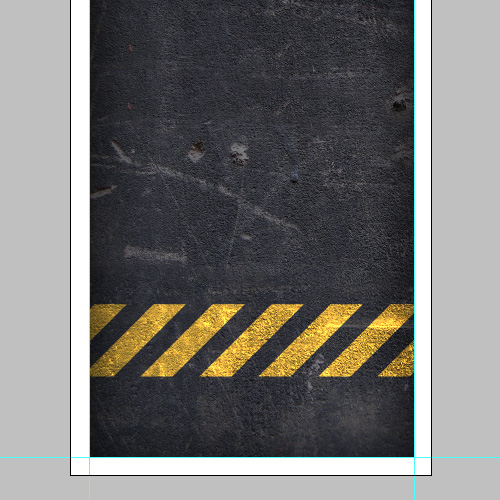
Step 14
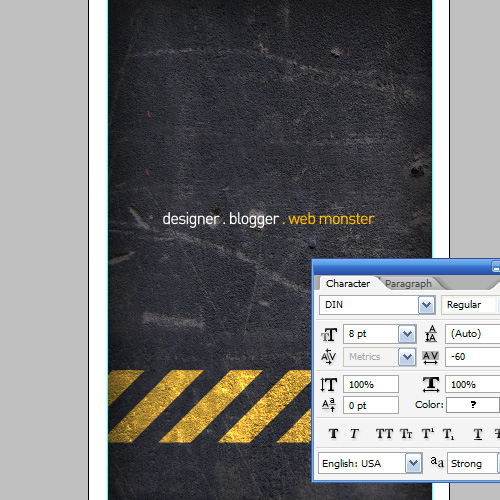
Next I placed some nice text on the card. This is actually the back side of the card (we’ll do the front in a second). I used an uber cool font called DIN which is very minimal and as you’ll see in a second has an awesome ‘@’ character.I’ve set the type to be 8pt. If I remember correctly you should never go less than 6pt if you want something to be readable, and if you want it to be easily readable 7.5pt and above is best. As with all these things it depends on who your audience is. When making business cards for I would go with something that a person can quickly read at a glance when flicking through their pile of cards. When making something for myself, I often use small type because I can get away with it!
I also set the type to blending mode Linear Light so that it interacts a little with the background. Once this is done, we can save this document as Back.psd then go to File > Save As and this time save it as Front.psd, essentially duplicating the file to make the front.
Step 15
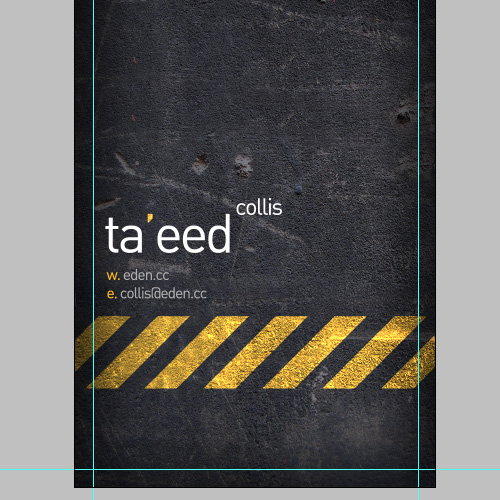
Once again for the front I’ve added a bit of text with my Web address and Email address and name. And for those type lovers amongst you, have a look at the ‘@’ character–isn’t it neat! DIN is an industrial typeface originating in Germany which you can read about on Wikipedia.Typography – or the art of using type/text in your designs – is one of those super important parts of design. If you come from a nondesign education background as I did, then it’s very important to go read up about it, because it’s the easiest way to pick a good designer from a bad. I’m not the best typographer around, but John Boardley is, and he runs one of my favorite blogs - iLoveTypography. If you want to get into type, go read his blog, it is the bomb!
Step 16
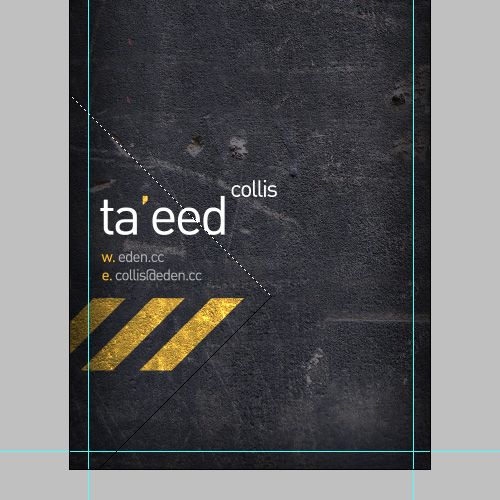
Now the next thing we want to do is to switch off some of those layers that have the yellow bars, so there are just three left over. I want it to sort of look like the yellow bars start on the front and continue around to the back.Next using the Polygonal Lasso Tool (L), draw out a triangular shape as shown.
Step 17
Then create a new layer just above the concrete texture and fill it with a dark grey and set the blending mode to Multiply. Now unfortunately that makes the yellow bits look dull, so we’ll fix that next!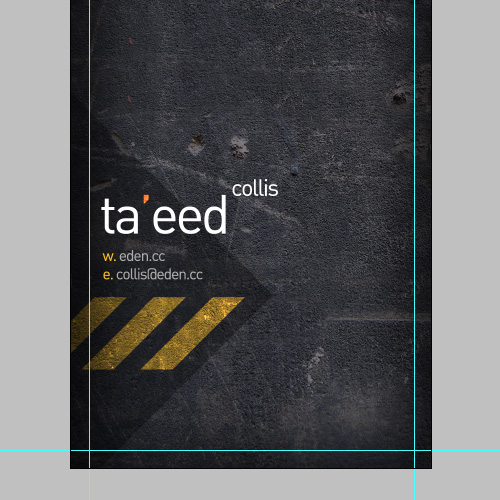
Step 18
So Ctrl-click the first of the yellow bar layers, then holding Shift down, click on the next one, then the next, so that you have the pixels selected for all three. Then press Ctrl+Shift+I to invert the selection as shown. While that’s selected, click on the triangle layer and click the Add a Layer Mask icon on your layers palette. This will mask out the areas of the yellow bars so that they shine through.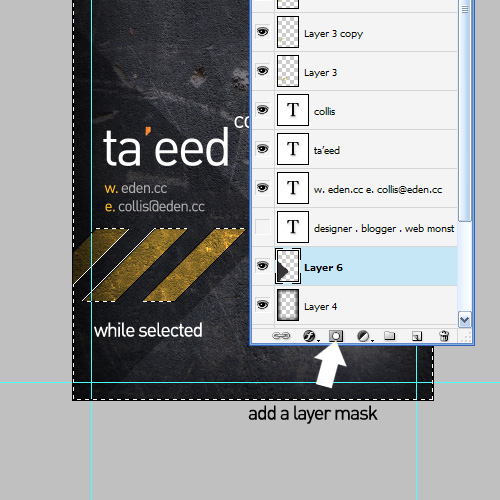
Step 19
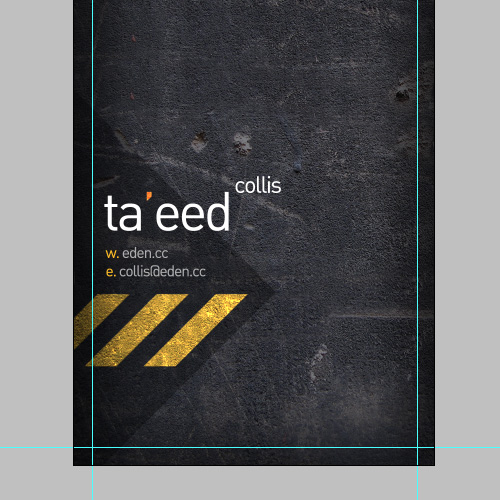
And there we have it! All done…Now we need to go to Layer > Flatten Image and then to Image > Mode > CMYK to switch back to CMYK and get ready for print. Note how because we flattened the image we preserve the way the yellow was interacting with the road behind it even though we’re back in CMYK. So basically we’ve taken advantage of RGB to achieve an effect and then flattened it down and switched back to CMYK so that we can print.
Step 20
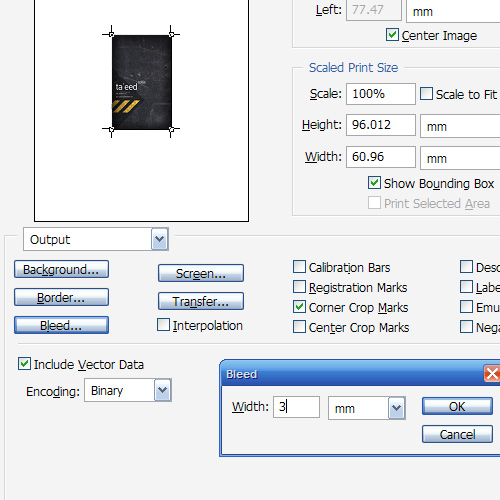
Now go to File > Print with Preview and you should see something like shown below. If you don’t have all the options, click on More Options and they will appear. Check the box which says Corner Crop Marks, then click on the button that says Bleed and set it to 3mm. Note that for some reason Photoshop doesn’t let you go much higher than 3mm for bleed. I don’t really know why they’ve put an artificial cap on it, but maybe there is some amazing reason that I don’t understand.Anyhow one thing you should do (that I just realized I didn’t do in the screenshot) is to untick Show Bounding Box.
Once you’re all done, you should be able to print to a PDF, do the same for the back, and deliver that to your printer. Note that to print to PDF, you need to have a copy of Acrobat installed (not just the free Acrobat Reader, but the full version). If you have this, then you’re all finished now!
If you don’t have Acrobat, never fear… all is not lost!
Step 21
If you don’t have Acrobat, then forget the Print with Preview way of doing this and instead, go back to your document, create a new layer at the top, then using the Single Column Marquee Tool make selections around your guides as shown.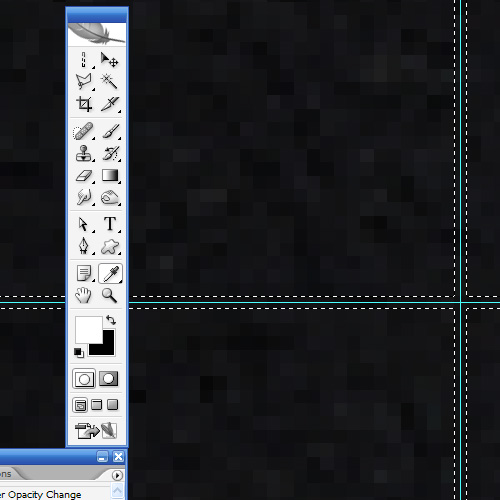
Step 22
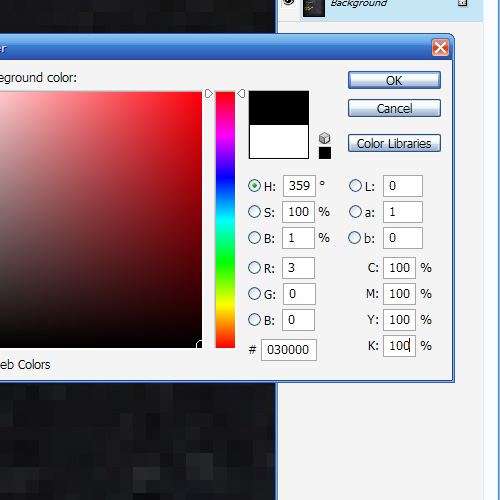
Now we are going to draw in our very own crop marks. To do this we need to make sure we use what is called Registration Black. Registration black is basically 100% of all the CMYK colors (as shown). There is a bit more to it than that, and you can read more on Wikipedia if you are interested.Anyhow so select the right color and then fill in those selections from the previous step. Then using the Rectangular Marquee Tool, cut away the lines so that there are just small single lines in each of the four corners left – i.e. four pairs of crop marks. Then go to Save As and save your file as a PDF using Photoshop. This should be OK for a printer, though to be honest I’ve never actually tried sending a file with crop marks like this to a printer, so it’s probably best to ask them if it’s OK before you go printing zillions of cards :-)
Step 23
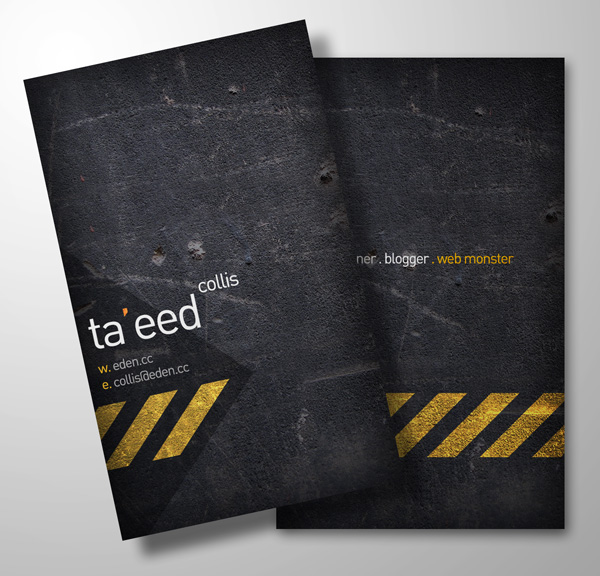
Anyhow so there’re my simple little business cards. They look kinda neat and should be ready to print. In the sample files you’ll find both the back and front as well as the PSD file I used to render this little image below which is my quick attempt at faking the printed cards.Don’t forget that over at FreelanceSwitch, there is the competition to make business cards using vectors from a special Arsenal sample pack. So if you’d like to Win $370 worth of vector gear, head over and put in your entry. You won’t need to do all the print-ready bits, so it’s nice and easy to enter.


0 Response to "Make Business Card Using Photoshop"
Post a Comment